Flower Shelves Spring is the time when we want renewal. There is a desire to get a haircut, supplement the wardrobe with fashionable novelties, and refresh the interior of the house. For the latter, it is not necessary to go for global changes: you can bring novelty to the interior decoration of the house with the help of decor and changes in the organization of space. And to create a spring mood, you can start with indoor flowers.

Placing flower pots just on the windowsill is no longer relevant today. Modern trends tell us that a flower corner can be organized in a more original way, which will bring zest to the interior and make it more comfortable. In this article, you will find ideas on how to make DIY flower shelves and how to organize your indoor jungle.
What are flower shelves?
Before we start inspiring you to change, let’s see what flower shelves can be. According to the installation method, flower shelves can be divided into the following types:
- Floor;
- Wall;
- Desktop;
- Suspended.
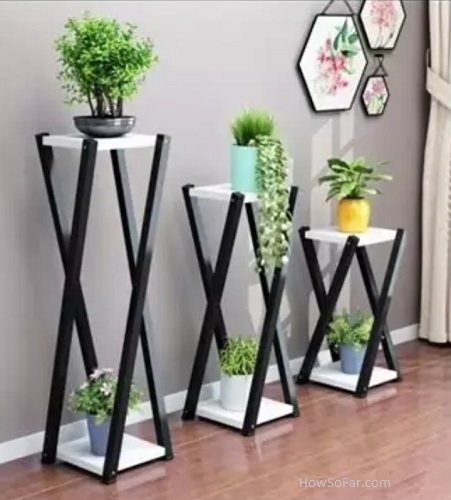
If you have a lot of flowers and at the same time there is free space in the house, you can stop at the floor option – for example, a rack or a bookcase. In the interior, this solution looks very stylish.
But if there is not much free space, it does not matter. All other types of shelves will help to use even a small space with benefits. Table shelves are most often “minimal shelves” – 2-3-tier structures that will allow you to place 2 or, respectively, 3 times more pots than a window sill. By the way, they can also be installed on window sills, not only on the table.
Wall and hanging shelves, in turn, are simply designed to take up as little usable space as possible, so this is a cool option for small apartments or houses.
According to the form factor, flower shelves can be:
- Straight – a classic version with a flat horizontal surface, a universal format for any type of installation;
- Multi-tiered – shelf tiers can be placed both one above the other and with an offset to get a more interesting shape;
- Corners – usually have the shape of a sector and are fixed between two walls, they are single or multi-tiered;
- Figured – can also be single or multi-tiered and have round, oval or other shapes.
The choice of installation method and shelf format depends not only on the space available for them but also on your preferences. After all, the same space can be used in different ways. We offer you interesting ideas for creating shelves for flowers of different shapes and from different materials, which you will surely want to repeat.
Shelves for flowers on the floor: 7 interesting ideas
Of course, you can always take a ready-made rack and make a roomy flower organizer out of it. But there are more interesting options. And, by the way, even less expensive.
- The easiest way to create a multi-tiered floor shelf is to assemble it from brick blocks and boards. Such a design is assembled without a single nail and even without glue. To do this, you only need even bricks or blocks of the same size and boards of wood or chipboard of the desired length.
- Such a vertical shelf is good because adjusting the length of the shelves, allows you to fit it into any space, and besides, it does not require special tools. And it will look good not only indoors, but also on the veranda, balcony, or even in the courtyard of the house.
- Instead of bricks and boards, you can use wooden boxes, which are now so fashionable in the interior. We just collect a pyramid of such organizers, arrange flowers and enjoy the result. If the bricks in the previous project add brutality to the shelving, then the construction of, in fact, wooden slats, looks softer and fits perfectly into any interior. Stylish and simple.
- By the way, such wooden boxes can serve as “legs” for an impromptu flower table. This solution is very relevant for a long space and is also very easy to assemble.
- Another option for a floor shelf is to assemble it from several stools. Here you can’t do without a drill and furniture dowels. For such a project, it is important to choose the same stools with even legs, then the design will be reliable. And after assembly, the resulting rack can be repainted in any color, which will allow it to be adapted to any style of interior.
- Experienced DIYers may like the more complex, but the noteworthy idea of creating an original DIY flower rack. From the rails, you need to assemble a frame of the desired height with crossbars, which, on the one hand, will be stiffeners for reliability, and on the other, will become a place for installing shelves.
- By the way, if you want to make such a rack, but you don’t want to mess with the base, you can use a ladder as a frame. By painting it with shelves in the same color, you can get an alternative and original floor shelf for house plants.
And if there is a flat stepladder, you can fix it on the wall and add shelves to it. Or hang the pots directly on the crossbars.
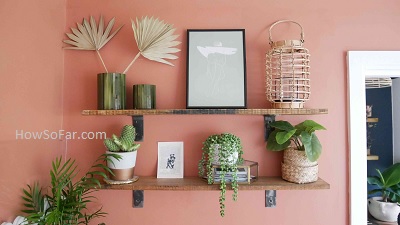
DIY wall shelves for pots
A modern wall-mounted flower shelf can look much more interesting than just a piece of board fixed to the wall. A simple, but at the same time quite effective option is to attach a metal basket to hooks on double-sided construction tape.
You can use more than one basket, but several, and install them at different levels. This is a convenient express method that allows you to place the “shelf” absolutely anywhere, but it is not suitable for large and heavy plants. But putting succulents, cacti, and violets like this is easy.
And you can make trendy hexagon shelves. They look great in different sizes. You can make them both from wood and improvised materials. Hexagon-shaped depilatory sticks glued together make a great shelf for small pots.
Interesting on the topic How To Lose Weight After Childbirth: 9 Tips From Nutritionists
And what about shelf-tablet, in which you can simply change the location of the shelves?
For the base, you will need a sheet (or several sheets if you want to make a large shelf) of thick plywood, chipboard, or furniture board. In this project, the shelves are mounted on thick furniture dowels, or a sawn wood stick of suitable thickness can be used instead.
Let’s start making:
- Draw a lattice on the base and drill holes at the intersection points of the lines, which will coincide in thickness with the thickness of the dowels.
- Think about how and at what level you will place the shelves and install the dowels in the right places.
- Attach the structure to the wall.
- Set the shelves on the dowels.
- Arrange your favorite flowers.
The advantage of such a shelf is that it is very easy to transform if over time you want to put other flowers here or use the panel to store other things.
If you have an empty wall near the window, here you can make a rotary multi-tiered shelf for plants. To do this, you will need a metal pipe, two wall mounts, two corner fittings (“elbows”), and connecting fittings that will become fixtures for the shelves, and the shelves themselves.
Shelves for indoor flowers can be taken ready-made or cut yourself. If you chose the second option, if desired, they can be rounded off with a jigsaw and opened with oil, stain, varnish, or paint. Then you need to drill holes in the shelves, which will be equal in diameter to the diameter of the pipe. Assemble the design, fix it on the wall, and voila!
Filling empty spaces with hanging shelves
Hanging shelves are a great way to make use of free space on top of a window or along walls. They can also be made both single and multi-tiered – depending on how much space is available and what size pots. However, especially large and heavy flowerpots should not be installed on weight.
To create the most popular hanging flower shelf, you will need a rope (or twine) and aboard. There may be several boards if you plan to create a multi-tiered shelf. 4 holes are drilled in the board at the corners – a rope will be threaded through them. The shelf is fixed simply on the knot of the rope at the desired level. You can hang the assembled structure on wall hooks.
- Or maybe just on the wall.
- And you can also replace the rope with a chain and get this result.
Another option is to make an original hanging shelf for one plant. A small board, two rings, four hooks, and macrame thread are all the materials you will need for such a shelf. It’s easy to do, but it looks unassuming.
We make corner shelves for flowers
If the house has an empty corner, you can make a pretty flower corner in it. The classic version with several triangular shelves looks quite organic in any interior.
But you can add brightness to such a corner by highlighting this zone with color.
However, you can move away from standard solutions and assemble a corner shelf panel. To do this, you will need a lot of slats of different lengths, wooden boards, and a building level to make everything work out smoothly. Place the slats in the corner at a distance that will be equal to the thickness of your shelves. Then you can change shelves or add new ones at any time without any problems.
Pallet shelves as a separate art form
- A shipping pallet is, it would seem, just a package for transporting bulk cargo. But reasonable consumption is now the trend, so today it is fashionable to use completely unexpected items to create various household items. Like pallets.
- It should be noted that pallets in interiors and exteriors are used quite widely today: they can be used not only to assemble flower shelves but also quite a complete piece of furniture – a bed, a coffee table, a sofa, or a dining area. Eco-friendly, simple, and quite stylish.
- Therefore, it is worth talking about pallets as the basis for a flower shelf separately, since there are many options for its use. For example, sanded pallets can be installed horizontally along the wall, and placed flower pots, books, and decor items inside the “legs”. Additionally, you can install a countertop on top of the structure and get a multifunctional interior console.
- Who is not ready for such radical changes in the interior, you can start small. For example, take a small pallet, sand it, install it so that the transverse boards are parallel to the floor, and make it flowers.
- By the way, the pallet can become the basis for a small vertical garden. It is perfectly possible to grow homemade greens in it, and even in an apartment.
- Turning it upside down, it becomes a convenient panel for placing flower pots. If you use flowerpots with hooks, then, apart from installing the base, you don’t even have to do anything.
And you can buy special holders for pots and fix them on a pallet.
Creative flower shelves from “nothing”
The most popular material for creating flower shelves is, of course, wood. Wooden shelves perfectly complement any interior and are appropriate almost anywhere. But having unnecessary things at home can also be turned into shelves for house plants.
For example, having a cardboard box, paper napkins, and PVA glue on hand, you can create the basis for a paper-mâché corner multi-tiered shelf. Don’t worry, the construction is pretty solid – the glue, soaking cardboard and paper, provides decent rigidity. The “napkin” texture can be leveled with putty, then the surface can be sanded and painted in any color.
If you have a shelf from an old refrigerator lying around, you can paint it with spray paint and hang it on the wall with double-sided tape. Do not forget to use a special primer for plastic before painting – this way the paint will lie better and will not chip off over time.
Even an old record can become a shelf for flowers; for sure, many of them still have them lying around somewhere on the mezzanine. There is nothing complicated here at all. Gradually heat the plate at the desired fold point until a 90° angle is obtained. Ideally, this is best done with a building hair dryer, but you can also use the one you use for hair. Everything remains attached to the wall and the original shelf is ready from nothing.
Taking several identical plastic trays with sides, wooden sticks (or metal pipes), glue, and paint, you can assemble such a desktop organizer for small plants or a small home garden. And it will look great on the windowsill too.
As you can see, there are many ways to spice up your flower corner with different shelves. And even if you don’t have enough space for plants, choosing the right type of shelves can make good use of almost any space. Get inspired and update your interior so that it always has a spring mood!
FAQs
- Can I use any type of wood for my flower shelves?
Yes, you can use any type of wood that you prefer for your flower shelves.
- How long does it take to make DIY flower shelves?
The time it takes to make DIY flower shelves will depend on your skill level and the size of the shelves you want to create.
- Do I need any special tools to make DIY flower shelves?
You will need a saw, drill, measuring tape, level, and sandpaper to make DIY flower shelves.
- Can I paint my DIY flower shelves any color I want?
Yes, you can use any paint color that you prefer for your DIY flower shelves.
- How do I keep my flowers healthy on my DIY flower shelves?
Make sure to water your flowers regularly and give them plenty of sunlight to keep them healthy and thriving on your DIY flower shelves.